The Tumbleweed Hoodie Edit
Let's add some sparkle to the one and only Tumbleweed Hoodie. Our classic unicorn trailblazing girlie is getting a mini makeover so she shines only brighter!
Items you will need:
- 1 Tumbleweed Hoodie
- Large Rhinestone Shoelace
- ⅜ Inch Eyelet Kit
- Crop-A-DI POWR Punch .25” Hole Puncher
As usual, all items will be linked below.

How to:
Today, we’ll be adding rhinestone lacing detailing to the bottom edge. This is an extremely simple tutorial to follow along with but just be patient and make sure you have all the right tools.

Start by cutting your hoodie right above the pocket line.

Then mark your placement for eyelets. I am spacing mine out every 2 inch starting with eyelets on each of the side seams and 1 inch away from our newly cut hem.
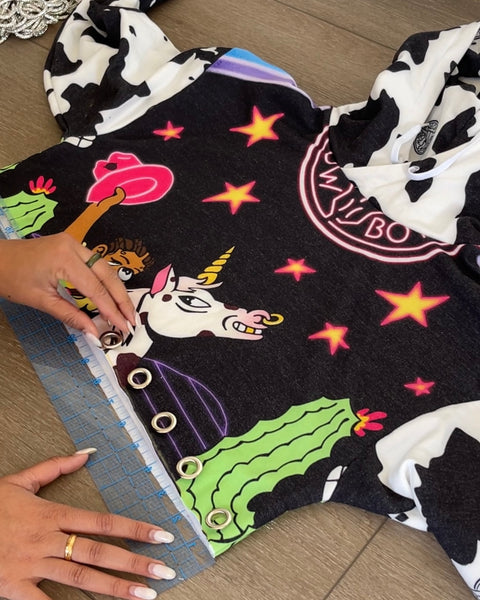
Once you’ve marked your placements, use your Crop-A-DI POWR Punch .25” Hole Puncher to punch your holes out.

Place an eyelet in each of the new holes we have created and use the eyelet tool to secure the eyelets into the hem of the hoodie.

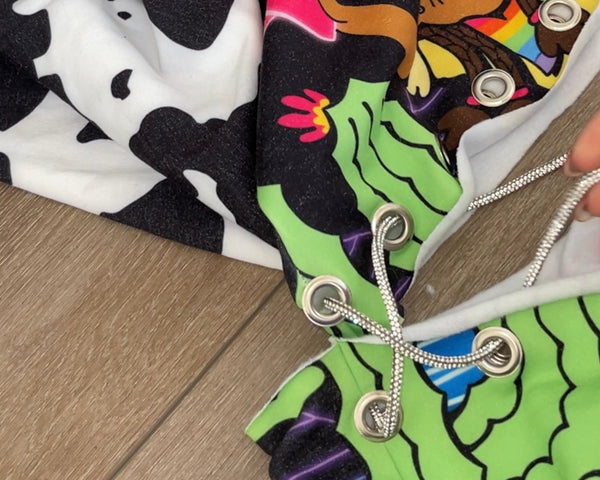
Next, we’ll focus on the bottom half of the hoodie. Using the scrap with the pocket on it, use a seam ripper to remove the pocket from the material. Once you have done so, draw a line that is 4 inches down from the top edge. Cut along that line to create your new hem of your hoodie.

We will repeat the process we used for adhering the eyelets on the top of the hoodie to the bottom. Start at the side seam and place each eyelet 2 inches away from each other and 1 inch away from the cut top hem.

Optional: Sew the raw edges of each piece with a .25 inch seam allowance.

Once this is complete, you can lace the rhinestone shoelace between the two pieces of your hoodie.
Now enjoy your stylish upcycled hoodie!

Links to purchase items:
- Tumbleweed Hoodie
- Large Rhinestone Shoelace
- ⅜ Inch Eyelet Kit
- Crop-A-DI POWR Punch .25” Hole Puncher
Love your Neon Cowboy, Mirai